-
Optics
-
Window
-
Windows
-
Windows
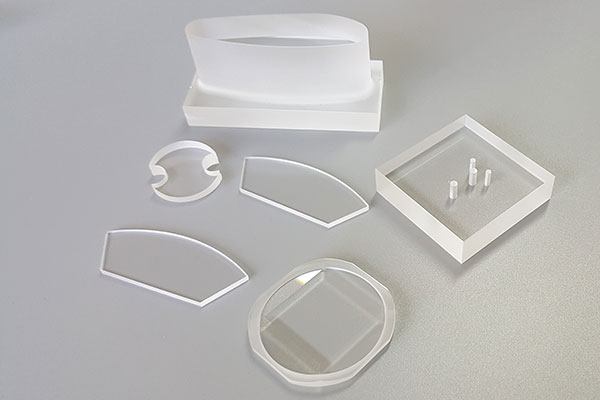
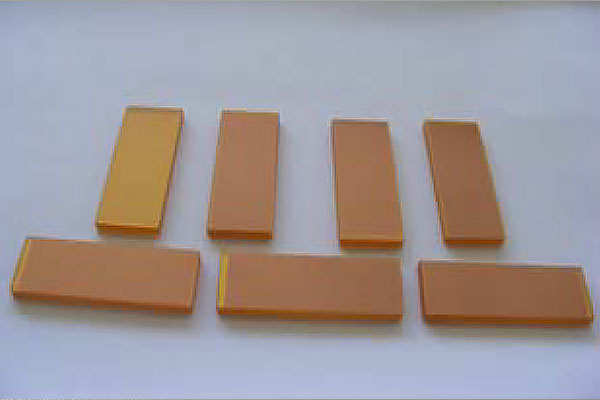
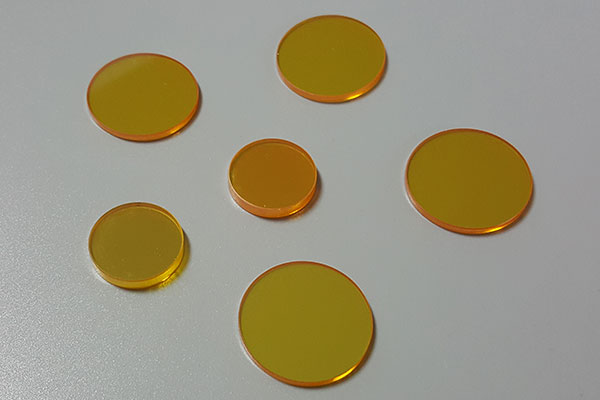
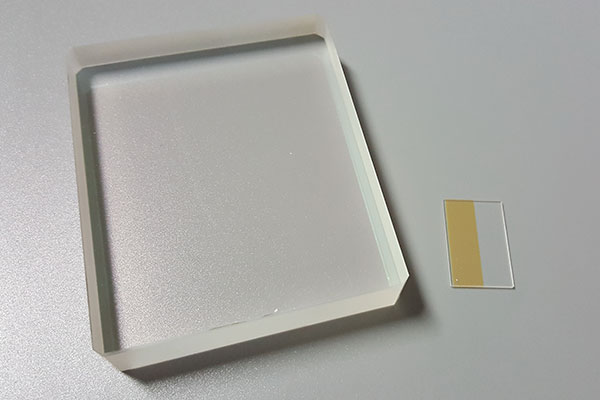
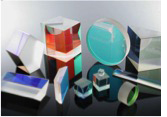
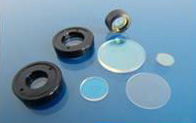
Windows are used to enable optical radiation to pass from one environment to another without allowing the environments to mix. materials, transmission, scattering, wavefront distortion, and resistance to certain environments should be considered when selecting windows
-
-
Custom Shape Window
-
Custom Shape Window
LaserStates has NC engraving and milling machines which could process custom shape windows (specical shape window, step window and with holes).
-
-
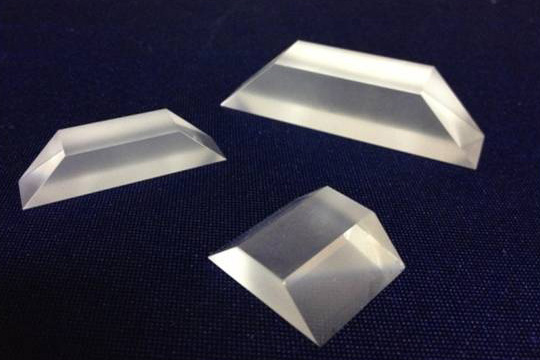
Wedge Window
-
Wedge Window
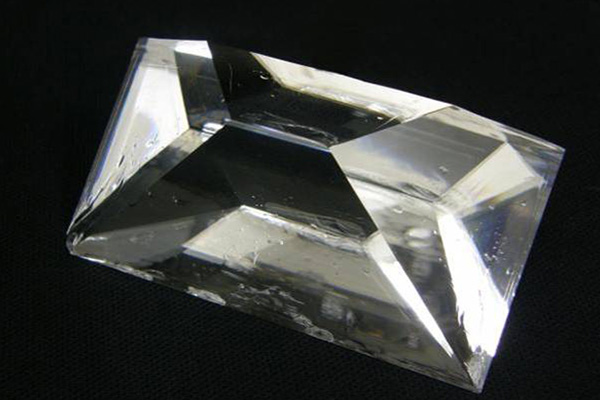
Wedge window is an optical element with plane-inclined surfaces, usually the faces are inclined toward one another at a very small angles. It diverts light toward its thicker portion. Wedge prisms can be used as isolating components. Wedges may also be used to produce a small deviation which doesn't allow return to source.
-
-
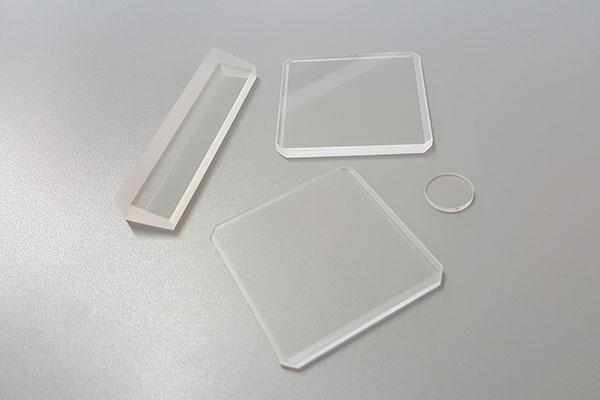
Brewster Window
-
Brewster Window
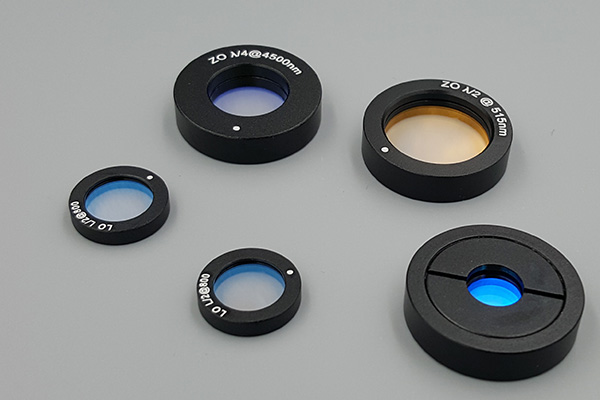
Windows for installation at the Brewster angle.
Reflects a polarized light whose electric field vector oscillates orthogonally to the plane of incidence, and transmits a polarized light whose electric field vector oscillates in parallel with the plane of incidence with a minimum reflection loss.
-
-
Cover Slip
-
Cover Slip
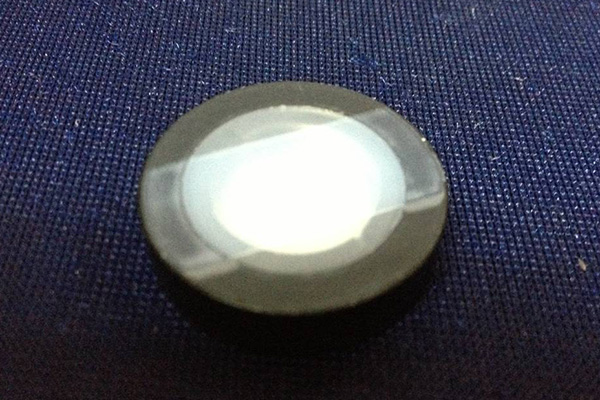
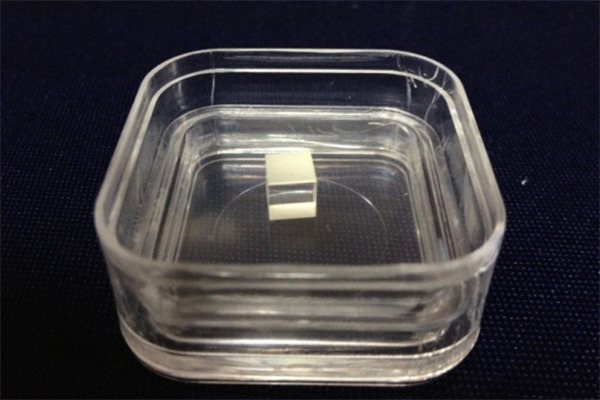
Cover Slip is a small thin piece of glass used to cover a specimen on a microscope slide.Also called cover glass. LaserStates could offer 0.02-0.03mm thickness coverslip
-
-
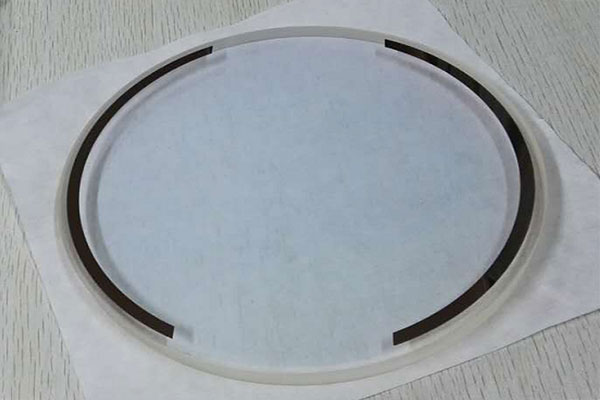
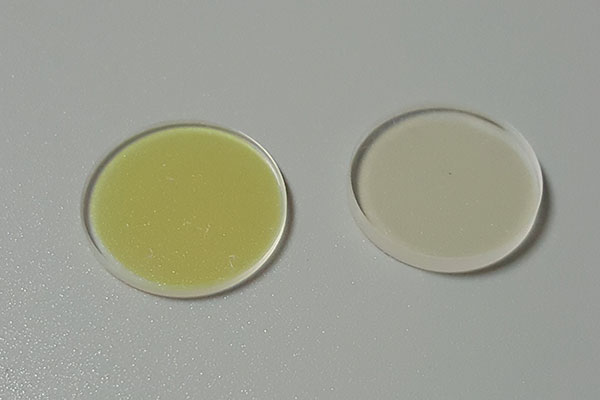
ITO Window
-
ITO Window
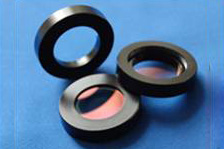
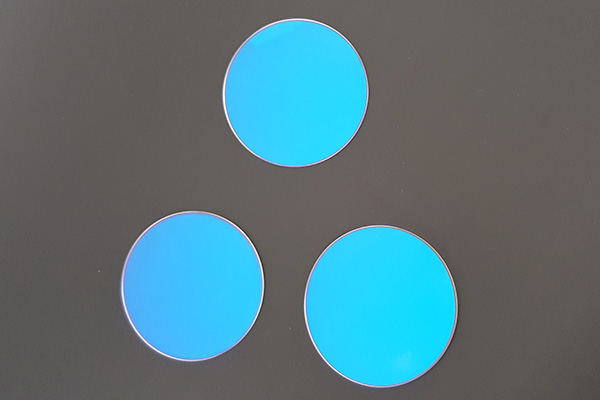
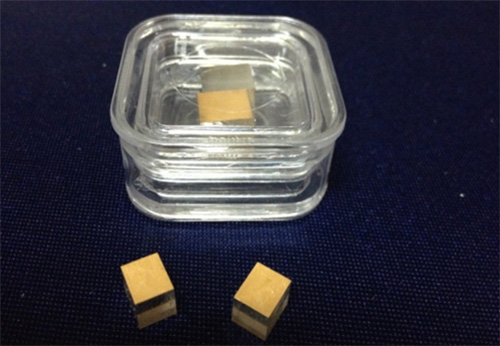
ITO coated window is a conductive Indium Tin Oxide (ITO) coating on one surface and Antireflection coating on the other surface. ITO conductive glass windows can be used for LCD/LED, electro-optical applications, solar system, and so on.
The ITO coating thickness was chosen to provide an excellent balance between the sheet resistance of 50 - 120 Ω/sq and optical performance.
N-BK7 provides excellent transmission in the visible and near infrared portions of the spectrum .
-
-
Window
Windows are used to enable optical radiation to pass from one environment to another without allowing the environments to mix. materials, transmission, scattering, wavefront distortion, and resistance to certain environments should be considered when selecting windows.
-
Windows
-
Lens
-
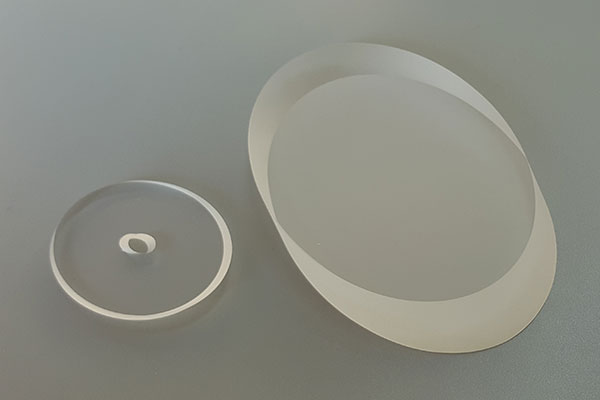
Plano Convex Lens
-
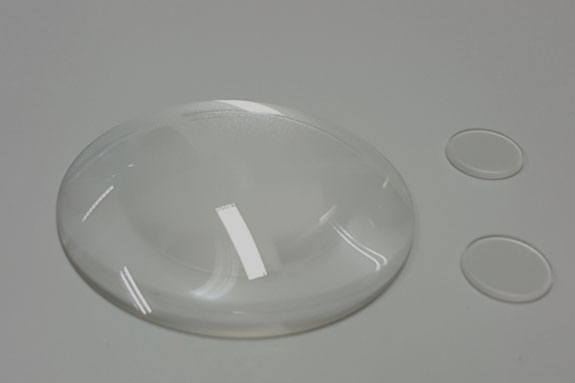
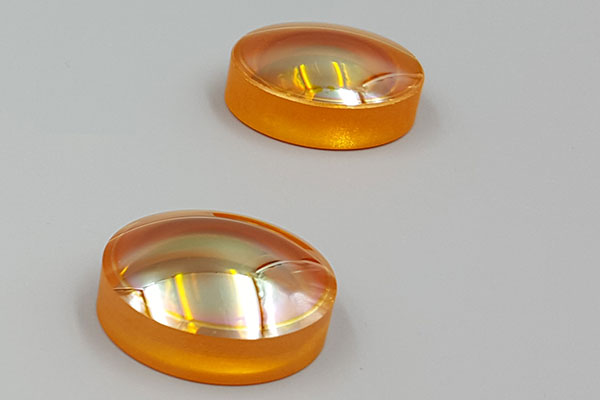
Plano Convex Lens
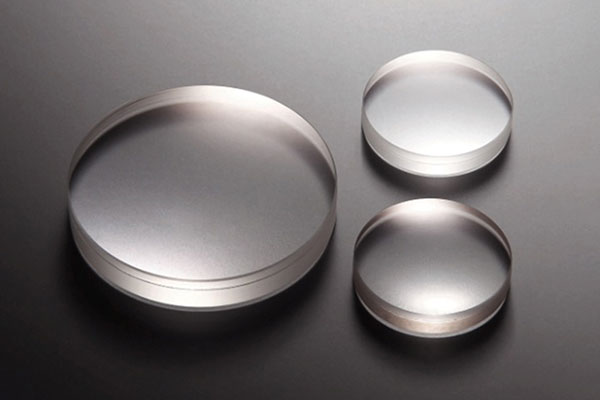
Plano-convex lens has one flat and one convex surface. Thay have a positive focal length and, when the preferred focal plane is adjacent to the flat surface, they closely approach best-form for infinite and near-infinite conjugate ratios.
-
-
Plano Concave Lens
-
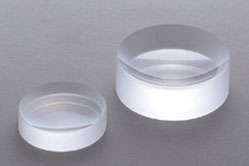
Plano Concave Lens
Plano-concave lens has one flat and one concave surface. They have a negative focal length and are often used to expand light or to increase focal lenghts in optical systems.
-
-
Bi-convex Lens
-
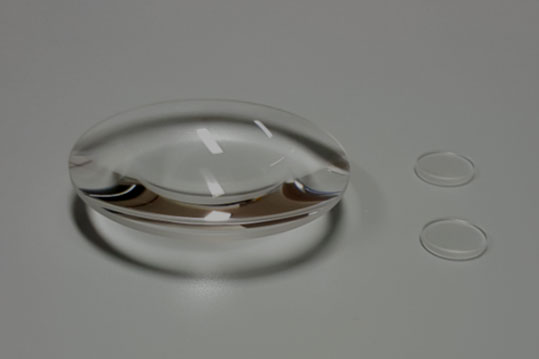
Bi-convex Lens
Bi-convex Lens is manufactured with an identical convex surface on both sides of the lens. This kind of lenses has positive focal length and form both real and virtual images.
-
-
Bi-concave Lens
-
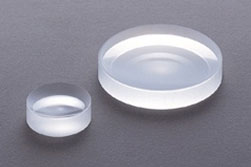
Bi-concave Lens
Bi-concave lens has a negative focal length and two concave surfaces with identical radii.
-
-
Meniscus Lens
-
Meniscus Lens
Meniscus lens has one surface convex and the other surface concave. They are used to change the focal length of another lens. Meniscus lenses can be used with another lens to produce longer or shorter focal lengths.
-
-
Achromatic Lens
-
Achromatic Lens
Achromatic lens has considerably reduced values of spherical aberration. Chromatic aberrations. Best used to replace single components where performance must be improved.
-
-
Cylindrical Lens
-
Cylindrical Lens
Cylindrical Lens is used to provide focusing power in one section only. For illumination or detection of light from line sources. Also used for anamorphic compression of beams and images.
-
-
Aspherical Lens
-
Aspherical Lens
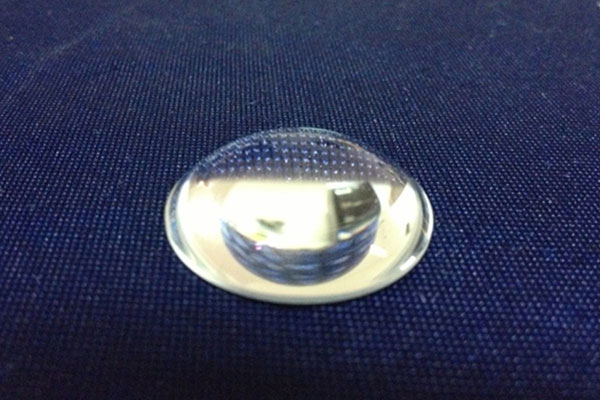
Aspheric lens is a single lens for collection and condensing, which the radius of curvature of one side is changed according to the height from the optical axis to minimize spherical aberration. The other sides are plano or convex.
These lenses can condense lights at a short focal length that cannot be done with spherical lenses.
-
-
Lens
Optical Lenses are optical components designed to focus or diverge light. Optical Lenses, which may consist of a single or multiple elements, are used in a wide variety of applications from microscopy to laser processing. Many industries utilize Optical Lenses, including life sciences, imaging, industrial, or defense.
-
Plano Convex Lens
-
Mirror
-
Light Weight Mirror
-
Light Weight Mirror
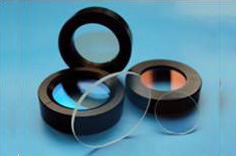
LaserStates manufacture economical light weight mirrors with material Fused Silica, Silicon, Borofloat33, Ultra-Low Expansion Glass and other optical glass, etc. The light weight mirrors are widely used in Optical Telescopes, LiDAR Systems, Scanners, Airborne Optical Systems.
-
-
Dielectric coated Mirror
-
Dielectric coated Mirror
Dielectric coating can produce very high reflection (more than 99.8% at designed wavelength) They are generally used in a single wavelength laser cavity where the lowest cavity loss at a center wavelength is essential. LaserStates can provide dielectric coatings with center wavelength from 250nm to 2200nm according to customers' requirement. When selecting a suitable dielectric high reflective coating, the damage threshold requirement must be considered.
-
-
Metallic coated Mirror
-
Metallic coated Mirror
Metallic high reflective coatings made of Au, Ag and Al are applied where a consistent high reflection over a wide spectral range is necessary. Their reflectivity is not higher than dielectrics HR coatings, but their HR spectrum can cover the near-UV, visible and near-IR. In order to prevent these metallic coatings from oxidization, these coatings have dielectric overcoat.
-
-
Dichroic Mirror
-
Dichroic Mirror
Dichroic mirrors are longpass and shortpass filters that are used at non-normal angles of incidence. They highly reflect one specified spectral region while optimally transmitting another. Dichroics are available at all wavelengths, with reflectivity typically reaching values greater than 98% and transmission typically exceeding 85%. Dichroics are non-absorbing so that all light that is not transmitted is specularly reflected.
-
-
Mirror
Optical Mirrors are designed to reflect light for a variety of applications, including beam steering, interferometry, imaging, or illumination. Optical Mirrors are used in a wide range of industries, such as life sciences, astronomy, metrology, semiconductor, or solar.
-
Light Weight Mirror
-
IR Optics
-
Thin Film Polarizer
-
Thin Film Polarizer
"Thin Film Polarizer is used to split a laser beam into two parts with S and P Polarizations.Conversely, Thin Film Polarizer 's can be used to combine two beams with S and P polarizations.
Thin Film Polarizer 's consist of a coated plate, which is oriented at Brewster's angle with respect to the incoming beam. The thin film coating will enhance the reflectivity of the s-polarized component of the beam, while maintaining high transmission of the p-polarized component."
-
-
ZnSe Lens
-
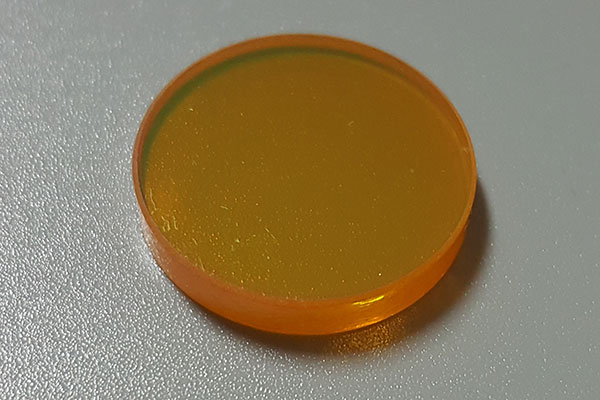
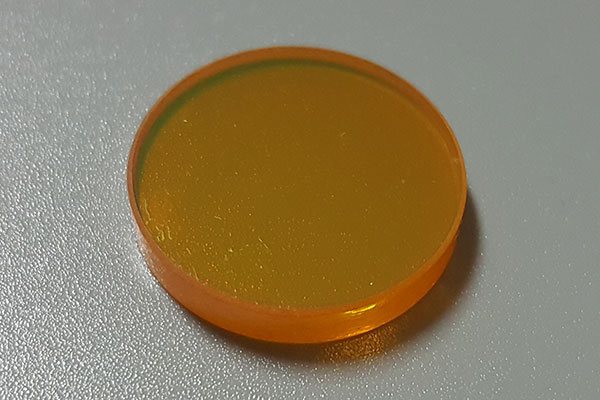
ZnSe Lens
ZnSe lenses are typically used as collimators for laser applications, such as biomedical and military applications. These lenses are also particularly well suited for use with high-power CO2 lasers. Additionally, they provide enough transmission in the visible region to allow the use of a visible alignment beam, such as a HeNe laser.
-
-
ZnSe Output Coupler
-
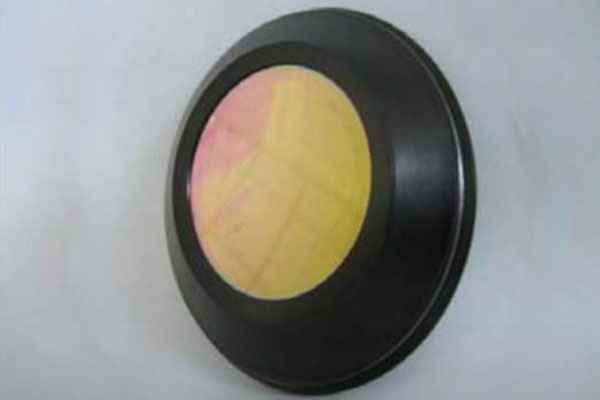
ZnSe Output Coupler
Output Coupler (Partial Reflectors)are commonly used as laser output coupler or beam attenuator.
Laser output couplers often require a slightly wedged substrate to eliminate interference from multiple reflections inside the component.
-
-
ZnSe Window
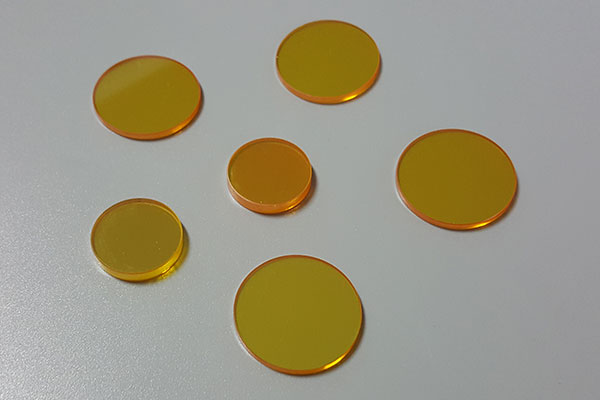
-
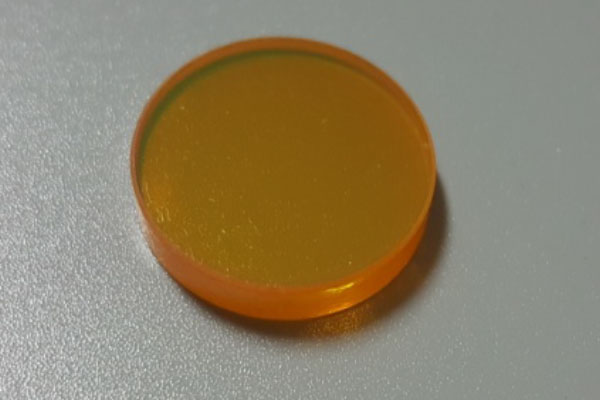
ZnSe Window
Windows are used to enable optical radiation to pass from one environment to another without allowing the environments to mix. materials, transmission, scattering, wavefront distortion, and resistance to certain environments should be considered when selecting windows.
-
-
F-theta Scan Lens
-
F-theta Scan Lens
F-theta scan lens is also called flat field lens or the linear lens.The radial image height equals to focal length of the lens multiplied by the angle of the chief ray makes in the object space.While General focusing lenses deliver a focused spot to only one point,
They deliver a focused spot to many points on a scan field or workpiece.Scan lens applications include:Marking;Engraving;Rapid prototyping;Drilling and Cutting .
-
-
ZnSe Beamsplitter
-
ZnSe Beamsplitter
The common Beams plitter is used to split or combine laser beam. However Polarization BeamSplitters are used to split or combine two perpendicular polarization laser beam.
The polarization beamsplitters are designed for use at 45° angle of incidence and 10.6μmwavelength. At this angle of incidence, there can be significant differences in the transmittance/reflectance values for s and p-polarizations.
The performance of Beamsplitters is mainly dependent on the coating specifications.
-
-
ZnSe Beam Combiner
-
ZnSe Beam Combiner
Beam combiner combines two wavelengths of light -- one in transmission and one in reflection-- onto a single beam path.
Our beam combiners are optimally coated to transmit infrared light(10.6μm/1064nm) and reflect visible light(650nm/632.8nm).
-
-
Reflective Phase Retarders
-
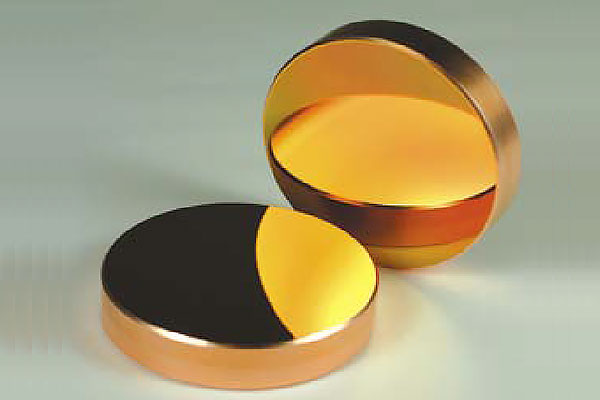
Reflective Phase Retarders
Metal cutting and other critical laser operations are sensitive to any variation in kerfwidth or cross-section. The kerf’s quality depends on the polarization orientation relativeto the cut direction.
Circular polarization consists of equal amounts of s-polarization and p-polarization for anybeam orientation, therefore all axes encounter the same composition of polarization, andmaterial is removed uniformly regardless of cut direction.
-
-
IR Optics
Zinc Selenide (ZnSe) Optical components are ideal for a wide variety of infrared applications including thermal imaging, FLIR, and medical systems. This chemically vapor deposited material has wide usage in high power CO2 laser systems because of its low absorption coefficient and high resistance to thermal shock.
-
Thin Film Polarizer
-
Prism
-
Right Angle Prisms
-
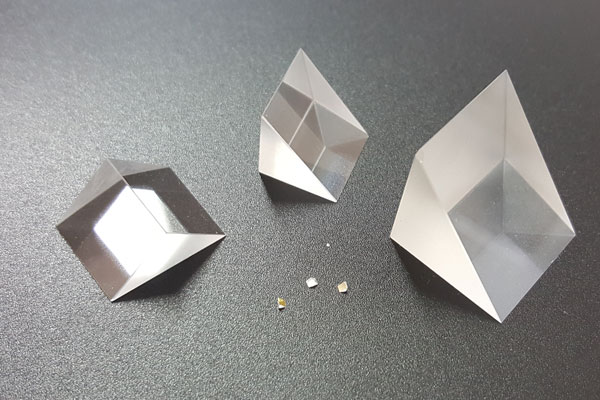
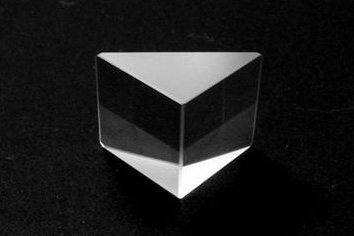
Right Angle Prisms
Right angle prism is deviating or deflecting a beam of light with 90 or 180°. It is often used in telescope, periscope and other optical system.
-
-
Corner Cube Retroreflectors
-
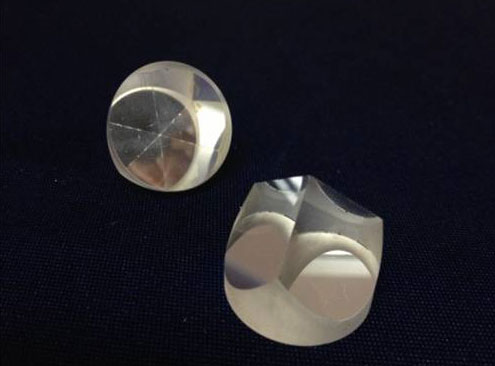
Corner Cube Retroreflectors
Conner Cube Retroreflectors are triangular prisms consisted of three right angles of 90 degrees. Reflected beam has a characteristic of inevitably returning in the direction of the incoming optical axis. The accuracy is shown with angular deviation (parallelism) between input and output beams. It depends on the mutual perpendicularity of the trihedral surfaces. Using this characteristic, they are often used in survey equipment.
-
-
Custom Shape Prism
-
Custom Shape Prism
Laserstates could offer custom shape prism includes special shape prism, micro prism and prism assembly.
-
-
Penta Prisms
-
-
Equilateral Dispersing Prisms
-
Equilateral Dispersing Prisms
Equilateral dispersing prisms are used for wavelength separation applications. Deviation is a function of refractive index, and hence wavelength. Angular dispersion ∆θd is the difference in deviation for light rays having different wavelengths and varies with prism orientation.
-
-
Rhomboid Prism
-
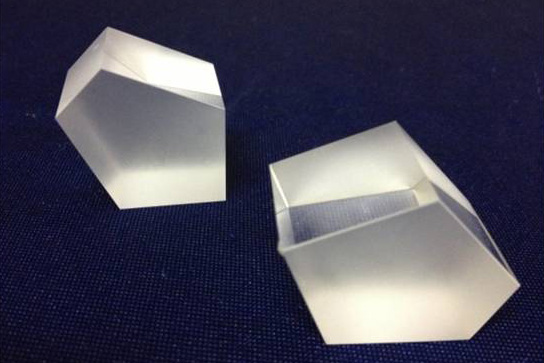
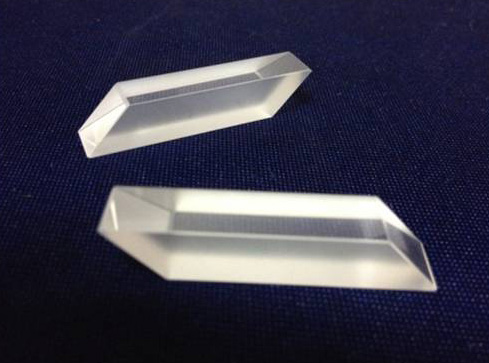
Rhomboid Prism
Rhomboid prisms are used to displace a laser beam without changing its direction. In imaging applications, they will displace the optical centerline without inverting the image. The lateral displacement is equal to the length of the prism. High tolerance angles keep the output beam parallel to the input beam to within 30 arc seconds making our rhomboid prisms ideal for demanding displacement applications.
-
-
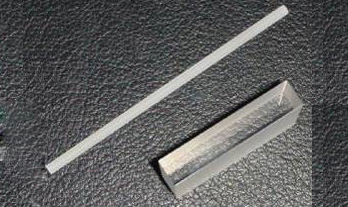
Light Pipes
-
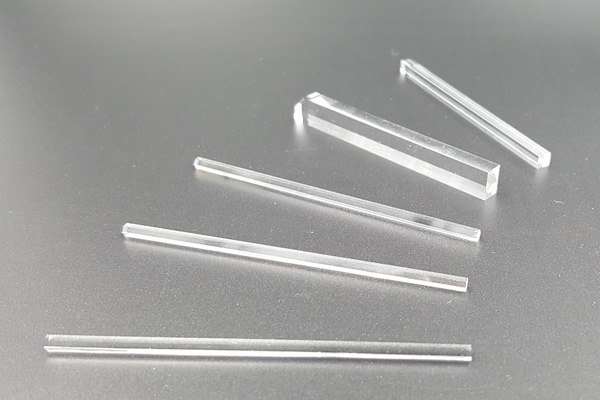
Light Pipes
"Light pipe homogenizing rods utilize total internal reflection to homogenize non-uniform light sources regardless of their spectral characteristics. Their hexagonal configurations provide 35% less light loss
than a comparable square configuration. Low Numerical Aperture (NA) sources require longer pipes to uniformly homogenize light while shorter pipes will sufficiently homogenize the output from high NA sources."
-
-
Dove Prisms
-
Dove Prisms
180 degree retroreflectors. As the prism is rotated, the image passing through will rotate at twice the angular rate of the prism.
-
-
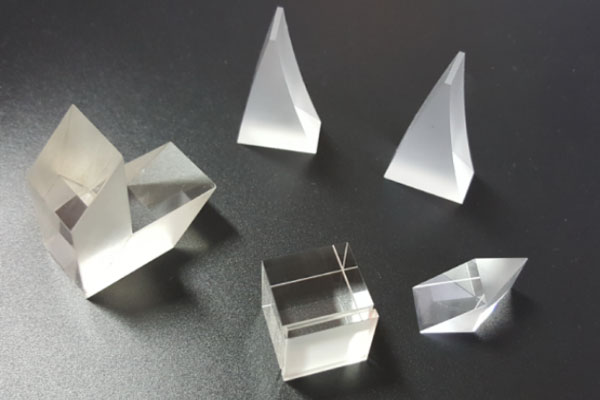
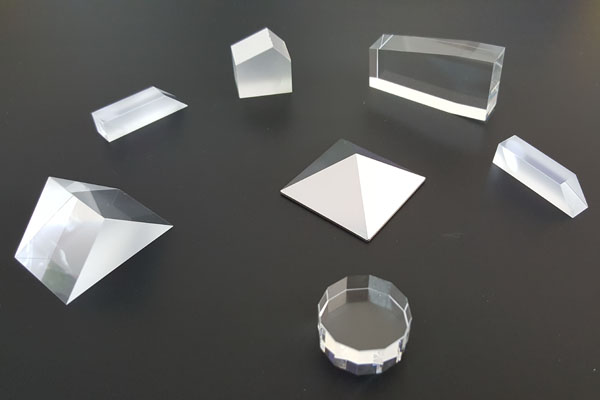
Prism
Optical Prisms are used to redirect light at a designated angle. Optical Prisms are ideal for ray deviation, or for adjusting the orientation of an image. An Optical Prism’s design determines how light interacts with it. When light enters an Optical Prism, it either reflects off an individual surface or several surfaces before exiting, or is refracted as it travels through the substrate.
-
Right Angle Prisms
-
Filter
-
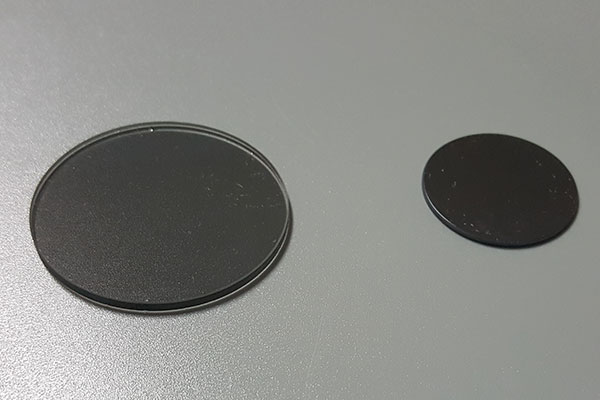
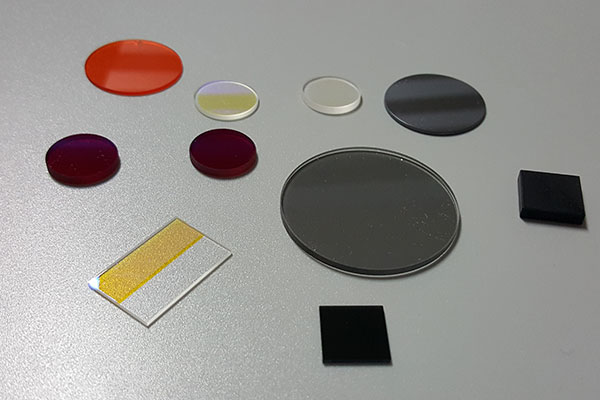
Color Glass Filters
-
Color Glass Filters
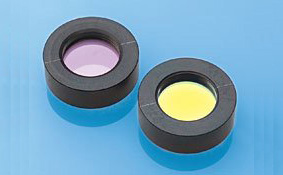
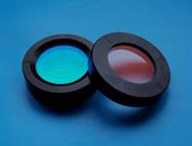
Optical filters selectively transmit light of different wavelengths, usually implemented as plane glass in the optical path which are either dyed or have interference coatings.
-
-
Neutural Density Filter
-
Neutural Density Filter
"Neutral density (ND) filters reduce light intensity in the visible region of 400nm to 700nm wavelength range.
Neutral density glass characteristics may vary with melting conditions but the filter performance can be compensated by changing the filter glass thickness."
-
-
Band pass Filter
-
Band pass Filter
Bandpass filters are optical elements that are designed to transmit a specific spectral band with high efficiency, while reject others. The characteristics of the bandpass are controlled by multilayer dielectric coatings
-
-
Laser line interference Filter
-
Laser line interference Filter
Laser line filters are narrow bandpass filters centered on the resonance of the laser, which attenuate the background plasma and secondary emissions that often result in erroneous signals.
-
-
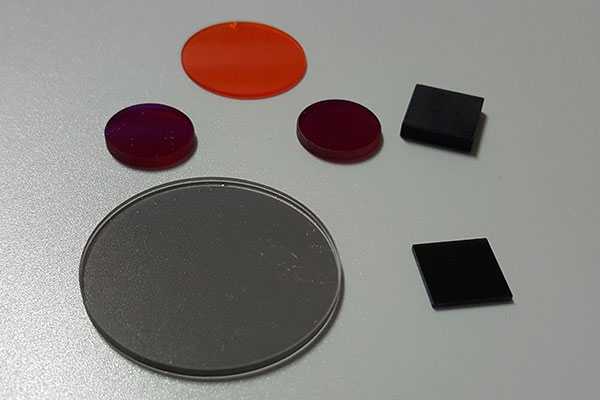
Filter
Optical Filters are used to selectively transmit or reject a wavelength or range of wavelengths. Optical Filters are used in applications such as fluorescence microscopy, spectroscopy, clinical chemistry, or machine vision inspection. Optical Filters are ideal for life science, imaging, industrial, or defense industries.
-
Color Glass Filters
-
Micro Optics
-
Micro Optics
-
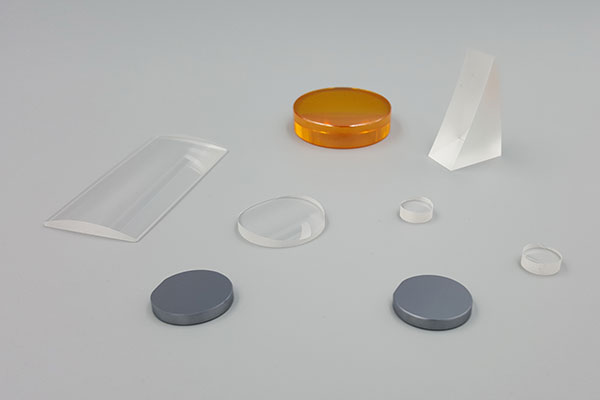
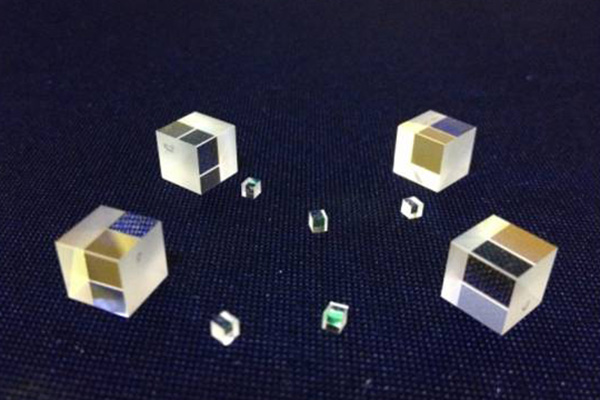
Micro Optics
LaserStates' micro optics are widely used in medical applications such as endoscopes and ophthalmic systems; and in industrial applications such as inspection and other tasks where their small size and their renowned high-quality optical imaging is so important.
-
-
Micro Optics
LaserStates' micro optics are widely used in medical applications such as endoscopes and ophthalmic systems; and in industrial applications such as inspection and other tasks where their small size and their renowned high-quality optical imaging is so important.
-
Micro Optics
-
Optical Components
Optical Components are used to alter the state of light through a variety of means including focusing, filtering, reflecting, or polarizing. Optical Components are integrated into a limitless number of applications, such as microscopy, imaging, or interferometry, for industries ranging from the life sciences to testing and measurement.
Fuzhou Laserstates Electronics Co., Ltd.
Tel: +86-591-83222716; Fax:+86-591-83222716
sales@laserstates.com; http://www.laserstates.com
-
Window
-
Polarization
-
Waveplates
-
Low Order Waveplate
-
Low Order Waveplate
The low order waveplate which can be replaced by multi-order waveplate is designed to give a retardance of several full waves,plus the desired fraction.This results in a single,physically robust component with desired performance.However,even small varitation in wavelength or temperature will result in significant changes in the desired fraction retardance.
-
-
Zero Order Waveplate
-
Zero Order Waveplate
The zero order waveplate is designed to give a retardance of zero full waves, plus the desired fraction.Zero order waveplate shows better performance than multiple order wavepalte.It has broad bandwidth and a lower sensitivity to temperature and wavelengt
-
-
True Zero Order Waveplate
-
True Zero Order Waveplate
The true zero-order waveplate means that the thickness of waveplate is very thin (less than 0.1mm) which make the true zero-order waveplate excellent in temperature wavelength and incident angle (about 20º) bandwidth.
-
-
Achromatic Waveplate
-
Achromatic Waveplate
Achromatic waveplates are similar to zero-order except that the two plates are made from different material, such as crystal quartz and magnesium fluoride. Since the dispersion of the birefringence can be difference for the two material, it is possible to specify the retardation value at a wavelength range. Hence the retardation of the resulting waveplate can be made to low sensitivity to wavelength change. Based on the contact methods of the two plates, achromatic waveplates are classified into two types: air-spaced and cemented.
-
-
Dual Wavelength Waveplate
-
Dual Wavelength Waveplate
Double Wavelength Waveplate is a special kind of multi-order waveplate.It can meet the required retardation at two wavelength at the same time.It widely used to improve the conversion efficiency in solid double frequency laser device.
-
-
Rotator
-
Rotator
Roators offer 45° to 90°rotation at a number of common laser wavelengths.The optical axis in apolarization rotator is perpendicular to the polished face.The result is that the orientation of in put linearly polarized light is rotated as it propagates through the device.
-
-
Waveplates
LaserStates' waveplate, including octadic-wave(λ/8), quarter-wave(λ/4), half-wave(λ/2) and full wave(λ) plates, are widely used in synthesis and analysis of light in various states of polarization.
-
Low Order Waveplate
-
Beamsplitter
-
Beamsplitter Plate
-
Beamsplitter Plate
Beamsplitter Plates are part-mirrors that reflect part of incident energy and transmit the rest. It can be used with high power laser. When using beamsplitter plates, it is important to bear in mind that the two partial beams travel different optical paths. And the optical paths depend on the incident angle and the thickness of plates.
-
-
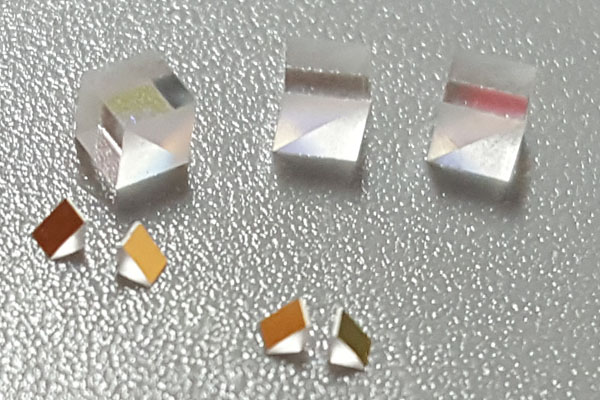
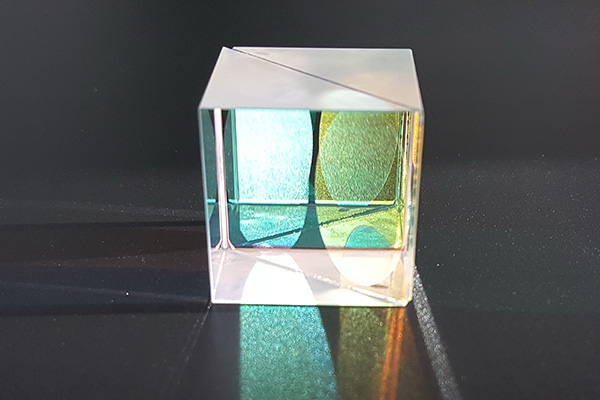
Beamsplitter Cube
-
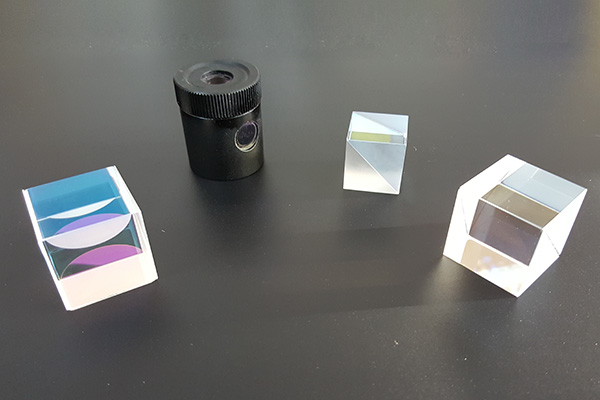
Beamsplitter Cube
Beamsplitter cube is constructed by two cemented right angle prisms. The hypotenuse is coated with partial dielectric coating. Cube Beamsplitter is recommended for use with collimated or nearly collimated beam. Convergent or divergent beam will contribute spherical aberration.
It is polarization sensitive. LaserStates could provide Beamsplitter Penta Prism.
-
-
Polarization Beamsplitter Cube
-
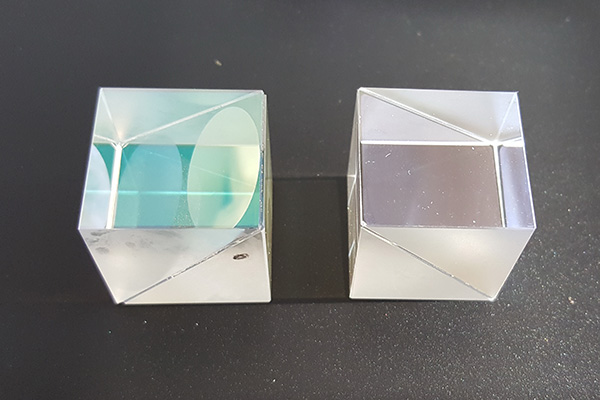
Polarization Beamsplitter Cube
Polarizing Cube Beamsplitters split randomly polarized beams into two orthogonal,linearly,polarized components-S-polarized light is reflected at a 90deg.Angle while P-polarized light is transmitted.Each beamsplitter consists of a pair of precision high tolerance right angle prisms cemented together with a dielectric coating on the hypotenuse of one of prisms.
-
-
Non-polarizing Beamsplitter Cube
-
Non-polarizing Beamsplitter Cube
Non-polarizing beamsplitter cube are constructed by cemented two right angle prisms. The hypotenuse of one prism is coated with hybrid metal dielectric coating, which exhibits moderate absorption with little polarization sensitivity.
-
-
Beamsplitter
Beamsplitters are used to split or combine beam of light. The most common types are plate and cubes. Plates are used for most laser applications as they exhibit low absorption. Cubes are a convenient, protected form for low power applications. The performance of beamsplitters are mainly dependent on the coating specifications. In selecting beamsplitters, the type, coating, transmission range and damage threshold should be considered.
-
Beamsplitter Plate
-
Polarizers
-
Glan Taylor Polarizer
-
Glan Taylor Polarizer
Glan Taylor Polarizer is made of two same birefringence material prisms which are separated by an air space. The polarizer with on side escape window is suitable for low to medium power application. Glan Taylor Polarizer will divide an entering unpolarized beam into beam rays, one is the extraordinary that is transmitted through the other side, and another is the ordinary ray that is totally internally reflected absorbed.
-
-
Glan Laser Polarizer
-
Glan Laser Polarizer
Glan Laser Polarizer is designed specifically for high energy laser. It is made of two same birefringence material prisms that are assembled with an air space. The polarizer with two escape windows allows the rejected beam to escape out of the polarizer which makes it suitable for high power laser.
-
-
Glan Thompson Polarizer
-
Glan Thompson Polarizer
Glan Thompson Polarizer is made of two α-BBO or calcite prisms cemented together. It has a wavelength from 200nm to 2300nm. α-BBO polarizer can be used from about 200nm to 1100nm, and calcite polarizer can be used from 350nm to 2300nm. This type polarizer has higher extinction ratio than air spaced polarizer. And it has the widest field angle of any design. For example, α-BBO Glan Thompson Polarizer has an angular field lager than 15 degree.
-
-
Wollaston Polarizer
-
Wollaston Polarizer
Wollaston Polarizer is made of birefringence material prisms that are cemented together. The ordinary ray in the first half of the prism becomes the extraordinary ray in the second half. The Wollaston Polarizing beam splitter has approximately twice the deviation for the Rochon Polarizer.
-
-
Rochon Polarizer
-
Rochon Polarizer
Rochon Polarizer is the earliest polarizer, which is made of two birefringence material prisms that are cemented together. This type polarizer separates incident beam into ordinary ray and extra-ordinary ray like Wollaston
Polarizer, but the extra-ordinary ray is straight transmitted through, while ordinary is transmitted with a deviation angle.
-
-
Polarizers
A polarizer is an important optical component that is widely used in optics to produce a state of linear polarization. LaserStates provides polarizers with three main materials, α-BBO, calcite and YVO4, making them suitable for the widest spectrum and high polarization purity application.
-
Glan Taylor Polarizer
-
Polarization Optics
Polarizers can be used to measure changes in magnetic fields, temperature, molecular structures, chemical interactions, or acoustic vibrations. As light passes through a Polarizer, the light’s polarization state, or the oscillation of the X and Y components of its electric field, is changed.
Fuzhou Laserstates Electronics Co., Ltd.
Tel: +86-591-83222716; Fax:+86-591-83222716
sales@laserstates.com; http://www.laserstates.com
-
Waveplates
-
Crystal
-
Laser Crystal
-
Diffusion bonded Crystal
-
Diffusion bonded Crystal
Diffusion bonded crystals consist of one laser crystal and one or two undoped material. They are combined by optical contact method and further bonded under high temperature. Diffusion Bonded Crystal helps to decrease thermal lens effect considerably.
-
-
Yb:YAG
-
Yb:YAG
It is more suitable for diode-pumping than the traditional Nd-doped systems. It can be pumped at 0.94 μm laser output. Compared with the commonly used Nd:YAG crystal, Yb:YAG crystal has a much larger absorption bandwidth to reduce thermal management requirements for diode lasers, a longer upper-state lifetime, three to four times lower thermal loading per unit pump power. Yb:YAG crystal is expected to replace Nd:YAG crystal for high power diode-pumped lasers and other potential applications.
-
-
Nd:YVO4
-
Nd:YVO4
Nd:YVO4 (Neodymium Doped Yttrium Orthovanadate) is the most efficient laser host crystal for diode pumping among the current commercial laser crystals, especially, for low to middle power density. This is mainly for its absorption and emission features surpassing Nd:YAG. Pumped by laser diodes, Nd: YVO4 crystal has been incorporated with high NLO coefficient crystals ( LBO, BBO, or KTP) to frequency-shift the output from the near infrared to green, blue, or even UV.
-
-
Nd:YAG
-
Nd:YAG
Nd:YAG (Neodymium Doped Yttrium Aluminum Garnet) crystal is the most widely used solid-state laser material today. Now, we are able to stably supply quantity of Nd:YAG rods with high optical homogeneity, consistent performance, high processing accuracy and on time delivery.
-
-
Nd:GdVO4
-
Nd:GdVO4
Nd:GdVO4 (Neodymium Doped Gadolinium Orthovanadate ) is a promising material for diode pumped lasers. Similar to the more well-known Nd:YVO4 crystal, Nd:GdVO4 crystal also exhibits high gain, low threshold, and high absorption coefficients at pumping wavelengths. Nd:GdVO4 has the additional advantage over Nd:YVO4 of a much higher thermal conductivity. For CW lasing at 1.06 μm and 1.34 μm and intracavity doubling with KTP and LBO, the gadolinium vanadate have produced a higher slope efficiency or optical conversion than Nd:YVO4.
-
-
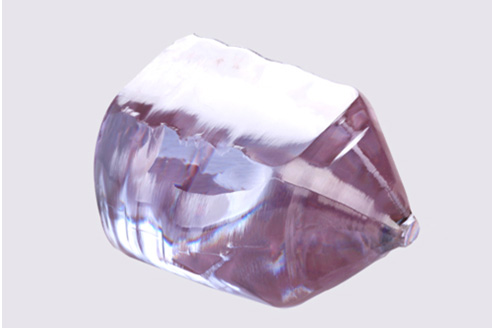
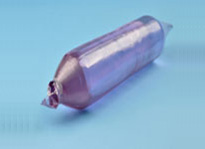
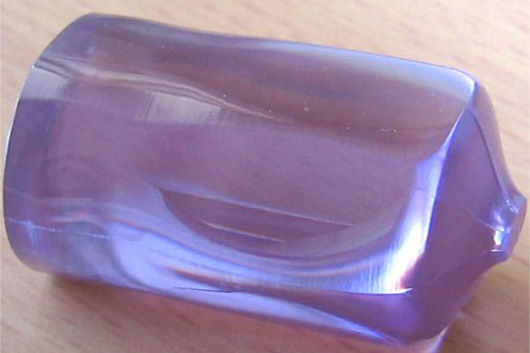
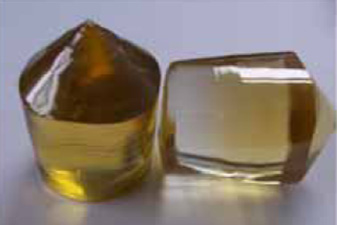
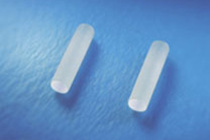
Laser Crystal
Laser crystals are typically single crystals (monocrystalline material) which are used asgain media for solid-state lasers. In most cases, they are doped with either trivalent rare earth ions or transition metal ions. These ions enable the crystal to amplify light at thelaser wavelength via stimulated emission, when energy is supplied to the crystal via absorption of pump light .
-
Diffusion bonded Crystal
-
NLO Crystal
-
CLBO
-
CLBO
CLBO (Cesium Lithium Borate ) is a newly developed nonlinear optical crystal It is a scarce crystal which generate fourth harmonic and fifth harmonics of the Nd:YAG laser output. Due to high damage threshold it can be application in solid-state UV laser. Besides CLBO possesses small walk-off angle large acceptable angular spectral and temperature bandwidth
-
-
KDP &DKDP
-
KDP &DKDP
Potassium Dihydrogen Phosphate (KDP) and Potassium Dideuterium Phosphate (KD*P ) are among the most widely-used commercial NLO materials, characterized by good UV transmission, high damage threshold, and high birefringence, though their NLO coefficients are relatively low. They are usually used for doubling, tripling and quadrupling of a Nd:YAG laser at the room temperature. In addition, they are also excellent electro-optic crystals with high electro-optic coefficients, widely used as electro-optical modulators, such as Q-switches, Pocket Cells, etc.
-
-
RTP
-
RTP
Regular Flux Grown RTP has an electric resistivity as low as 108 Ω·cm, which may exhibit the detrimental electrochromism when subjected to a dc electric field.
RTP crystals with high electrical resistivity (~1011-1012Ω·cm) have been grown successfully using our own proprietary technology. The electrochromism is not observed under a continuous 1000V/mm Z-directed electric field over more than 1000 hours. This RTP crystal has high damage threshold, large effective electro-optic coefficients and lower half-wave voltage. The Q-switch is built utilizing thermally compensated double-crystal designs.
-
-
LBO
-
LBO
LBO (Lithium Triborate, LiB3O5) crystal is an excellent nonlinear crystal.
For frequency doubling(SHG),tripling(THG) of Nd:YAG,Nd:YLF,Nd:YVO4 lasers, it is one of the most useful nonlinear optical materials in ultraviolet and visible laser applications.
-
-
BBO
-
BBO
BBO crystal is an important nonlinear optical crystals with combination of unique optical properties.Broad transmission and phase matching ranges, large nonlinear coefficient,high damage threshold and excellent optical homogeneity provide attractive possibilities for various nonlinear optical applicatios.
-
-
NLO Crystal
NLO Crystal means Nonlinear Crystal, LaserStates could provide CLBO, KDP&DKDP, RTP,LBO and BBO. Contact sales@laserstates.com for more information.
-
CLBO
-
Birefringent Crystal
-
Calcite
-
Calcite
Calcite is a carbonate mineral and the most stable polymorph of calcium carbonate (CaCO3). It's a negative uniaxial crystal and mostly used as visible and near IR polarizers.
It has high birefringence, wide spectral transmission and availability in reasonably sized rhombs.
Although is a fairly soft crystal and is easily scratched, it is ideal material used as visible and NIR polarizers such as Glan Thompson, and Glan Taylor and so on.
-
-
α-BBO
-
α-BBO
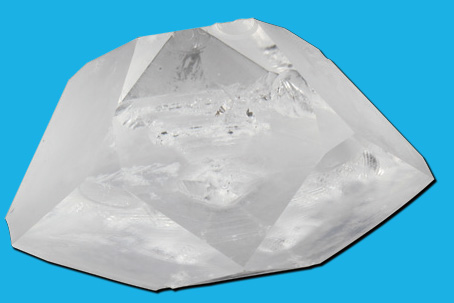
High temperature phase of α-BBO Crystal (BaB2O4) is one of the excellent birefringent crystals. It is characterized by large birefringent coefficient and wide transmission window ranged from 189nm to 3500nm. Due to its high chemical stability and medium hardness, α-BBO is fabricated easily into many kinds of optical components.
-
-
YVO4
-
YVO4
The yttrium orthovanadate (YVO4) is a positive uniaxial crystal grown with Czochralski method. It has good mechanical and physical properties and is ideal for optical polarizing components because of its wide transparency range and large birefringence. It also has good physical and favorable mechanical properties than other birefringent other crystals, which make it well suited for compact fiber optical components, such as isolators, circulators and interleavers etc.
-
-
Birefringent Crystal
LaserStates offer a number of birefringent crystals for polarization applications. Substrates include calcite, a-BBO and YVO4. Mounted and unmounted crystals are available.
-
Calcite
-
Magneto-optical Crystal
-
TGG
-
TGG
TGG is an excellent magneto-optical crystal used in various Faraday devices(Polarizer and Isolator) in the range of 400nm-1100nm, excluding 475-500nm.
-
-
Magneto-optical Crystal
The magneto-optical crystal TGG is an optimum material for Faraday devices (Rotator and Isolator) in the range from 400nm-1100nm, excluding 470-500nm.The Faraday rotator consists of a TGG rod contained inside a special designed magnet.
-
TGG
-
Scintillators
-
LaBr3:Ce Scintillator
-
LaBr3:Ce Scintillator
LaBr3:Ce Scintillators are the main components of nuclear radiation detector. LaBr3:Ce Scintillation detector can be used to detect the ionizing radiation just like X-rays and Gamma rays, etc.
-
-
LaBr3Ce Scintillation Probe
-
LaBr3Ce Scintillation Probe
The scintillation probe of LaBR series are made up of LaBr3:Ce Scintillators , fast-response photomultiplier, voltage division circuit, fast-response charge sensitive preamplifier and the metal case. Because the optimal design of direct coupling, the probe has many advantages like the high energy resolution, good energy linear and the fast response. It widely used in nuclear detection technology.
-
-
Scintillators
LaBr3:Ce Scintillators are the main components of nuclear radiation detector. LaBr3:Ce Scintillation detector can be used to detect the ionizing radiation just like X-rays and Gamma rays, etc.
-
LaBr3:Ce Scintillator
-
Crystal
LaserStates is specialized in manufacture and sale of laser crystals, nonlinear optical (NLO ) crystal, magneto-optical crystal, Scintillators. Research and Design crystals and professionally provide processing and coating service for worldwide customers.
Fuzhou Laserstates Electronics Co., Ltd.
Tel: +86-591-83222716; Fax:+86-591-83222716
sales@laserstates.com; http://www.laserstates.com
-
Laser Crystal
- Coating
- Coating
LaserStates is professional in coating design and service. We can do all kinds of coatings including filter coating, Anti Reflection Coating, High Reflection Coating, Filter Coating, Beamsplitter Coating, Metallic Coating etc.
Fuzhou Laserstates Electronics Co., Ltd.
Tel: +86-591-83222716; Fax:+86-591-83222716
sales@laserstates.com; http://www.laserstates.com
-
SLA Process
-
Introduction
-
About 3D Printing
-
About 3D Printing
Today, 3D Printing offers transformative advantages at every stages of creation, from initial concept design to mass production of final products and between all steps. Today’s competitive environment makes choosing the suitable 3D printers for every phase of creation more important than ever.
-
-
About SLA Process
-
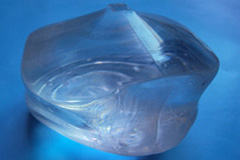
About SLA Process
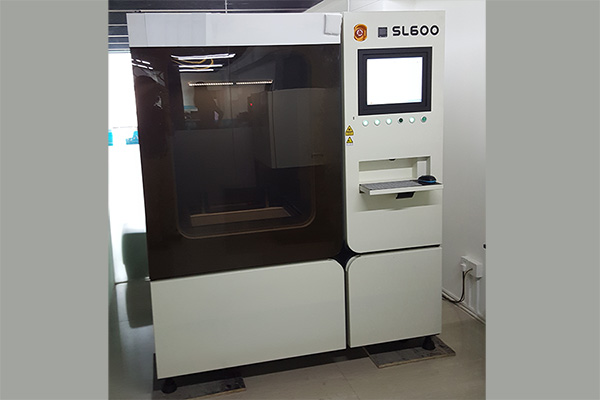
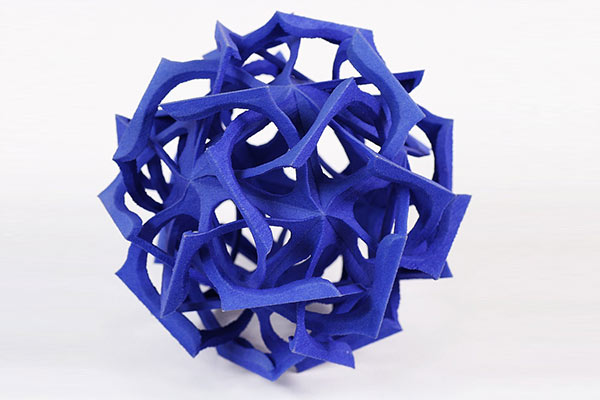
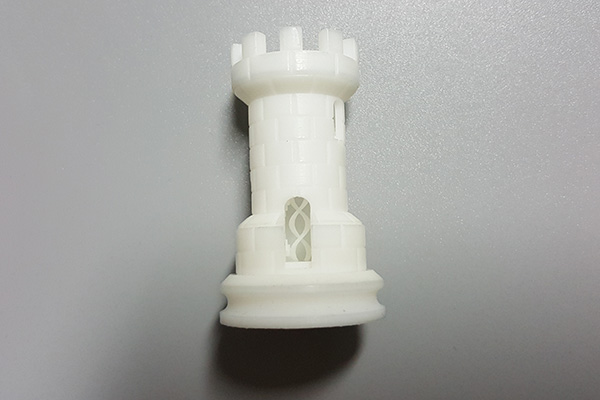
SLA Printer builds accurate parts directly by converting liquid material and composites into solid cross-sections, layer by layer, using an ultraviolet laser.
-
-
Introduction
Today, 3D Printing offers transformative advantages at every phase of creation, from initial concept design to mass production of final products and all steps during the process.
-
About 3D Printing
-
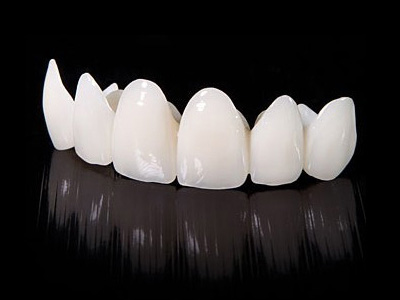
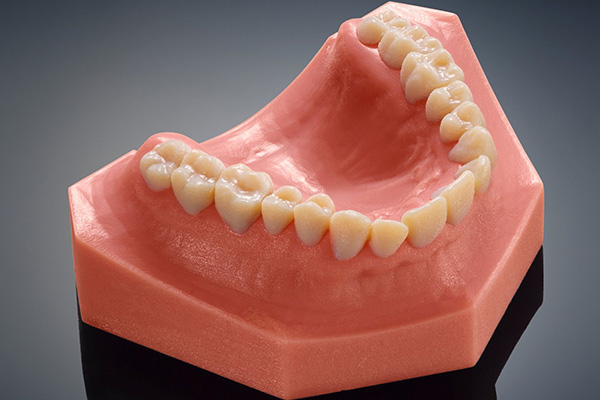
Application
-
Concept Model
-
Concept Model
Concept models improve the early design decisions that impact every subsequent design and engineering activity. Selecting the right design path reduces costly changes later in the development process and shortens the entire development cycle, so you get to market sooner.
-
-
Functional Prototype
-
Functional Prototype
3D printed prototypes so closely match the mechanical properties of production parts that they can be used for crash testing and other functional testing.
-
-
Pre-Production
-
Pre-Production
Pre-production 3D printing applications include rapid short-run tools, jigs and fixtures, which enable early production and assembly of final products, as well as end-use parts and first article functional products for testing and early customer placements.
-
-
Digital Process
-
Digital Process
For manufacturing applications, the key 3D printer attributes are high accuracy, precision and repeatability, material properties, specialized print materials specifically engineered for application requirements, part cost, and production capacity.
-
-
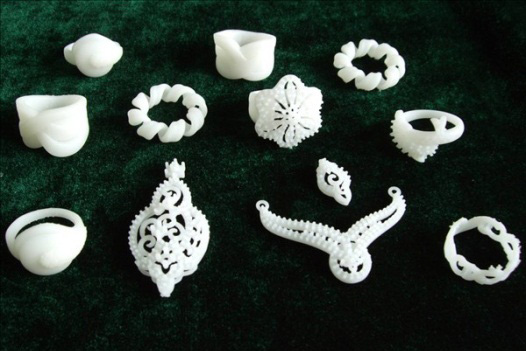
Application
At present, LaserStates has three larges SLA Printers, the printed parts are widely used in the Aerospace, Vehicle, Arts, Healthcare and industrial Area, help the customers to shorten the entire development cycle and get to the market sooner.
-
Concept Model
-
Service
-
Capability
-
Capability
For production, the required print capacity will be defined by the part size, the production run volume, and the printer’s ability to make the breadth of parts you need to create.
-
-
From Data to Parts
-
From Data to Parts
LaserStates will show the whole process from 3D data to the finished parts.
-
-
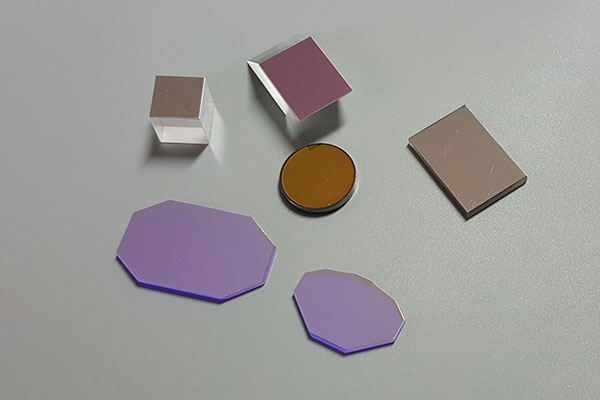
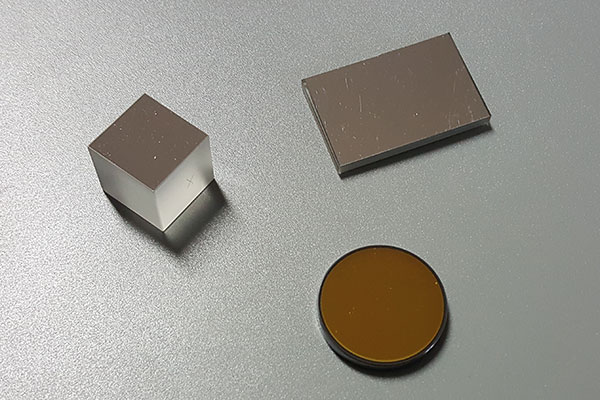
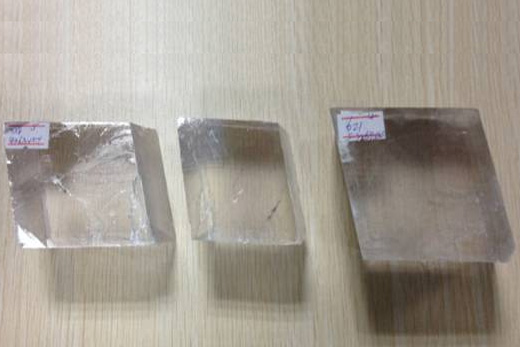
Comparison
-
Comparison
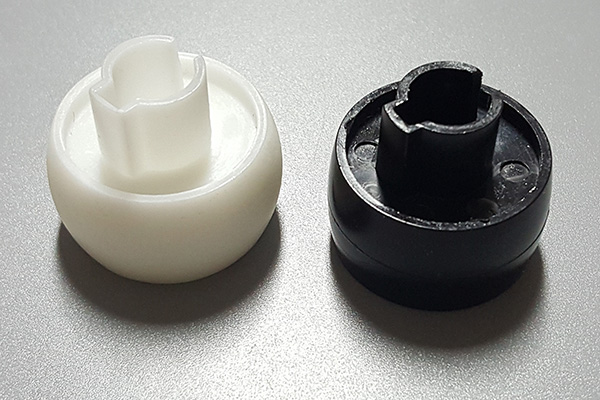
In order to compare the accuracy of the SLA printed parts and injection parts, LaserStates finished the comparasion inspection of two parts.
-
-
Service
LaserStates has changed the way product development and manufacturing professionals source custom-designed parts. We will help bring your designs to life
-
Capability
-
SLA Process
LaserStates has changed the way product development and manufacturing professionals source parts. We will print your conception or design, and make it real.
Fuzhou Laserstates Electronics Co., Ltd.
Tel: +86-591-83222716; Fax:+86-591-83222716
sales@laserstates.com; http://www.laserstates.com
-
Introduction
- Technology
- Technology
LaserStates is the best optics supplier with our mission – to exceed the requirement of the customer with our precision production technique. All the processes are aimed at achieving top-quality and improved lead time. Our top mission is to improve our production capability and quality to serve our customers to the best.
Fuzhou Laserstates Electronics Co., Ltd.
Tel: +86-591-83222716; Fax:+86-591-83222716
sales@laserstates.com; http://www.laserstates.com
- About Us
- About Us
LaserStates is the best optics supplier with our mission – to exceed the requirement of the customer with our precision production technique. All the processes are aimed at achieving top-quality and improved lead time. Our top mission is to improve our production capability and quality to serve our customers to the best.
Fuzhou Laserstates Electronics Co., Ltd.
Tel: +86-591-83222716; Fax:+86-591-83222716
sales@laserstates.com; http://www.laserstates.com
- Posts
- Posts
LaserStates will post the new technique and new products here, also you will find the Promotion Information here.
Fuzhou Laserstates Electronics Co., Ltd.
Tel: +86-591-83222716; Fax:+86-591-83222716
sales@laserstates.com; http://www.laserstates.com


From Data to Parts
LaserStates will show the whole process from 3D data to the finished parts.
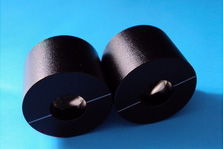
Background
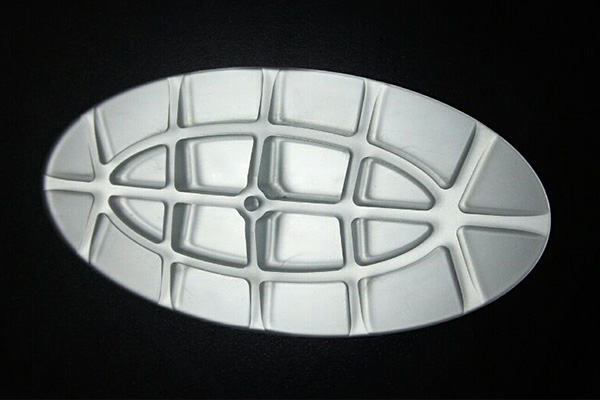
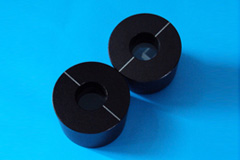
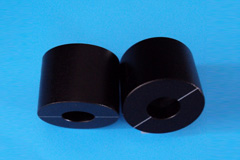
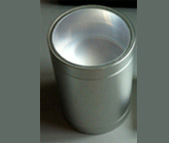
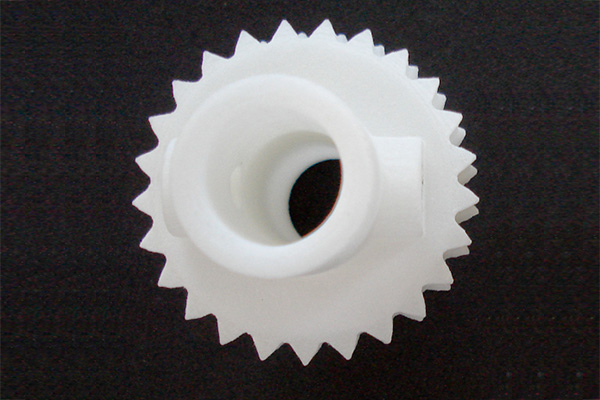
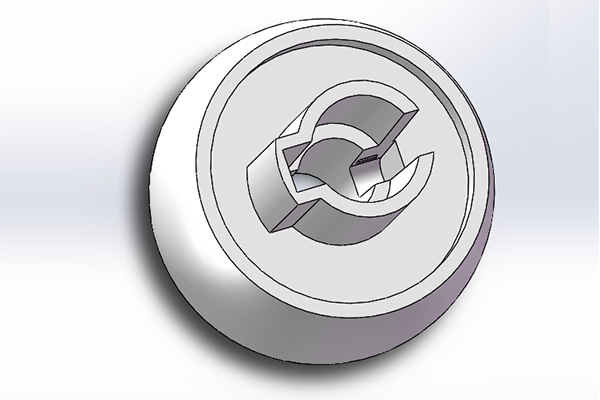
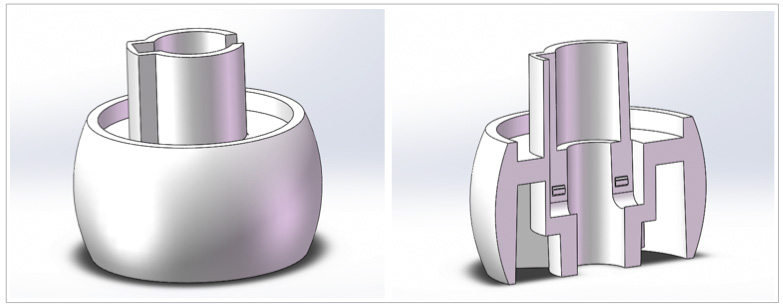
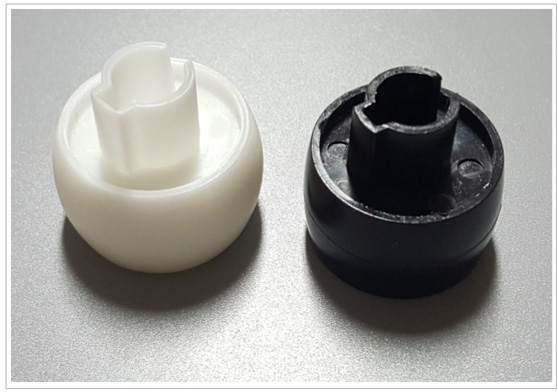
This black plastic part is named "Roller" which is installed on the shaft in the copy machine driven unit to fix the shaft.
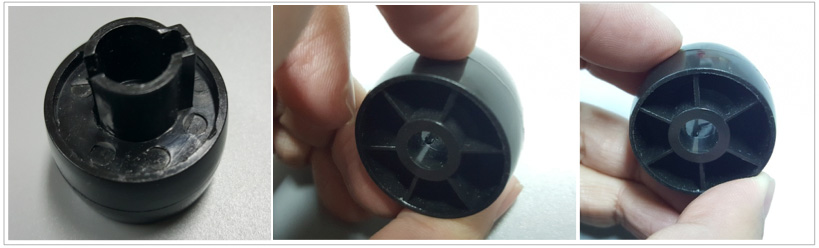
The diameter of the hole and the support dimension in the hole is very important for this part.
Some times, the support is defective due to adhering to mould. It effect the process very much.
LaserStates suggest the customer using SLA printer to process this part.
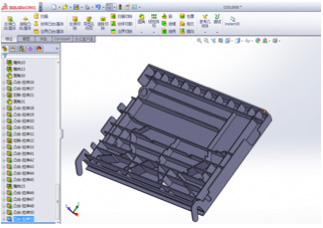
File
Customer sent the 3D data (STL file) to LaserStates CT Data from Hospital is acceptable.
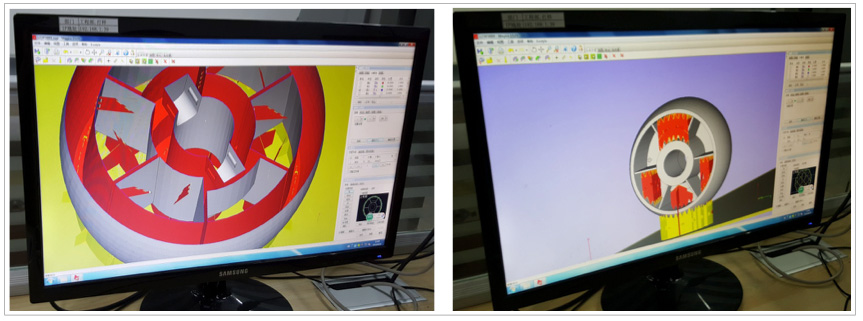
Supports Adding
LaserStates add the supports on the parts in Simulation Software and define the printing datum
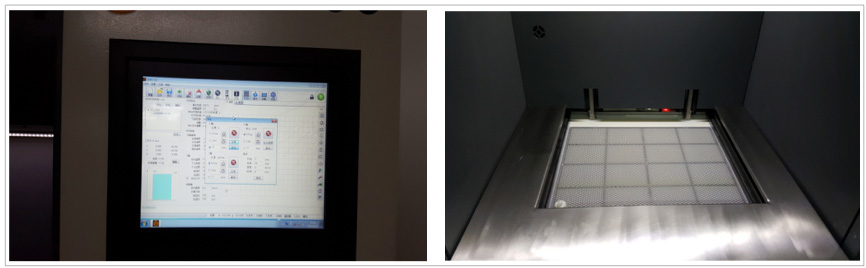
SLA Printing
The data was input to the SLA printer, after setting the parameter, the printer start printing
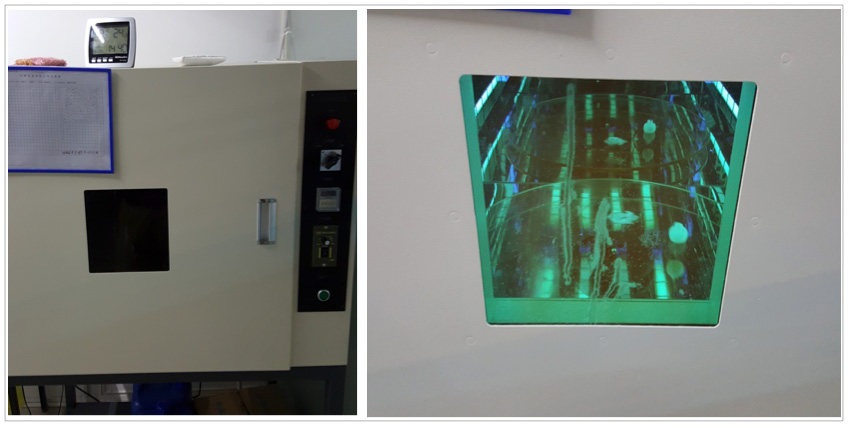
UV Curing Process
The printed parts were placed in the UV Curing Chamber, sart the UV Curing Process
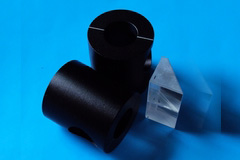
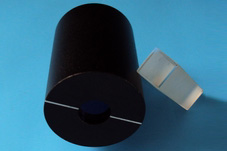
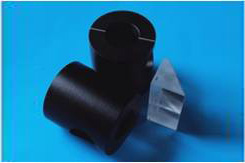
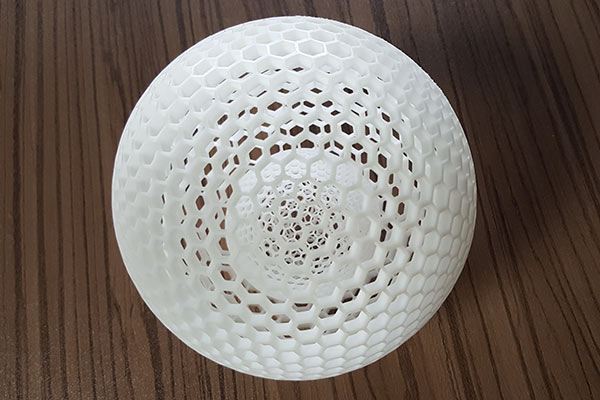
Cleaning and Inspection
Remove the supports, then clean the parts, finish the Whole process. The white part is SLA printed part.
Please send the 3D files to sales@laserstates.com to get Quick Quotes.
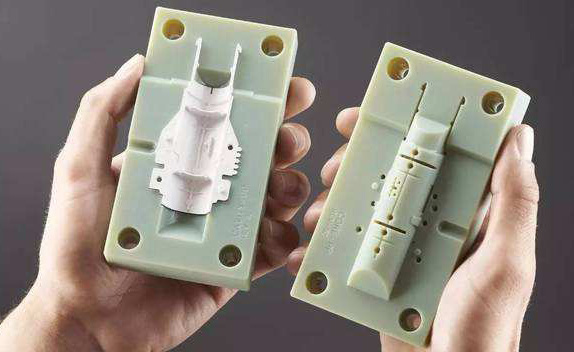
Injection Process
Here, LaserStates would like to introduce the process of Injection Parts.
How to process a mould?
Mould Design according to the parts → Mould parts design → Mould part machining → Mould assembly
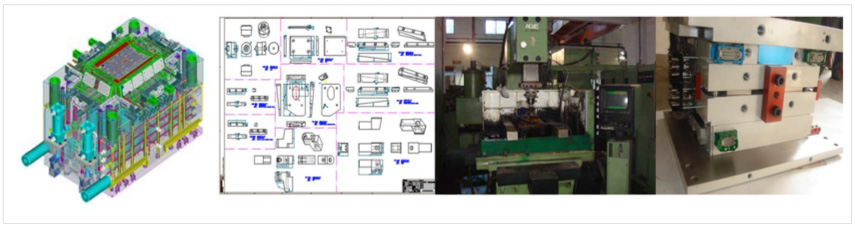
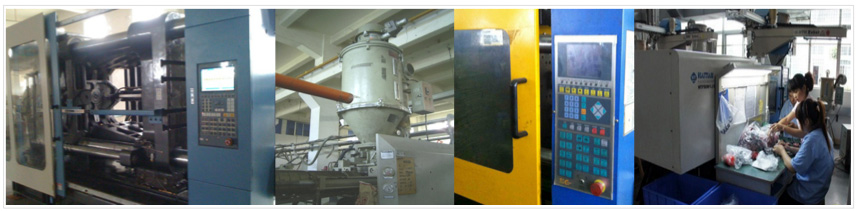
Next Step, the mound is installed in the Injection Machine.
→ Plastic Material Drying, Mould Heating
→ Injection Technique Setting
→ Trial Process
→ Start the mass production after the first article part is approved
Injection Process Difficulties
The designers should be familiar with the Injection Technique and the injection machine, otherwise, perhaps his design could not be processed by the injection machine.
 For injection parts, Engineers should understand
1) Keep Wall Thickness Consistent
2) Provide for Proper Gate Location
3) Determine Optimal Wall Thickness
4) Radius Corners Generously
5) Select Suitable Draft Angles
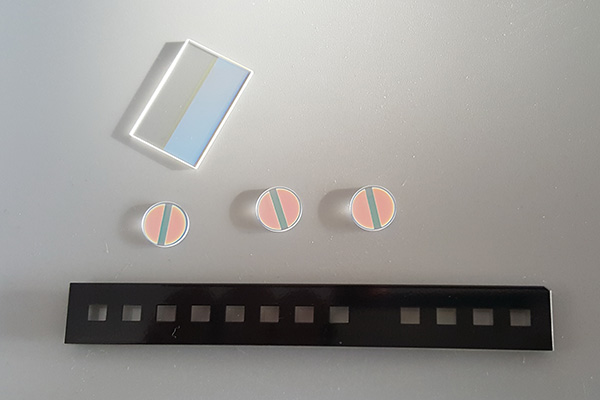
The designers should be familiar with the Injection Technique and the injection machine, otherwise, perhaps his design could not be injected successfully or there are many defects on the parts.Following are main defects happened in the injection parts.

| Photo Number | Defect Description | Main Reason | |
| 1 | Sliver Marks | The raw material hasn't been drying enough, etc. | |
| 2 | Short Shot | Temperature is too low or the area is far away from the gate, etc. | |
| 3 | Burnt Streaks | Temperature is too high, etc. | |
| 4 | Visible Ejector Marks | Injection pressure is too high, etc. | |
| 5 | Dark Sport | The raw material is dirty or the mould is dirty, runner is dirty, etc. | |
The 3D printer could printed all shapes, it will take less time in study the plastic technique for the designers.